CheBot III
Since I was a child, I wanted to build a robot, all by myself, but I had neither the knowledge nor the money for it.
Last summer, I did it. (Note: This post was written in January 2011, so that summer was 2010.)
I ordered parts from all over the world and put them together. It’s just a hobby project, and there is no plan for it. It just evolved. Although I have very little time at the moment, I am willing to extend hardware and software in the future.
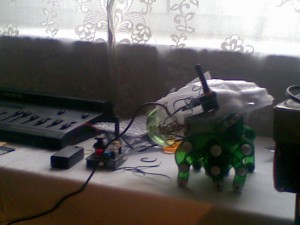
Why is it called “CheBot III”? Well, it’s not really my third robot, but I just thought the name sounds cool. CheBot I would be a small remotely controlled vehicle I built some years ago, and CheBot II is a small prototype using six legs, just for testing the wireless motor control.
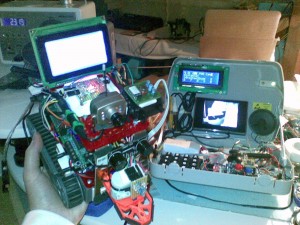
CheBot III consists of two parts: The robot, and the remote control.
Robot
- Core: Arduino Mega (using an ATmega1280 microcontroller at 16 MHz)
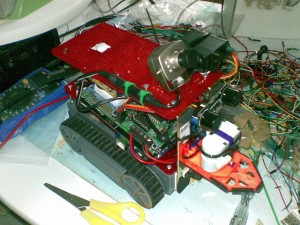
- Base: RP5-CH02 robot chassis with rubber tracks
- Adafruit Motor Shield for driving two DC motors
- Adafruit Wave Shield with SD slot for wave playback and recording and SD card access, plus external amplifier
- APC220 wireless module for communication with remote control
- Wireless camera with microphone, tiltable using a servo motor, plus 6 infrared LEDs for night vision
- Light sensor
- Extra microphone for recording
- Gripper, driven by a servo motor
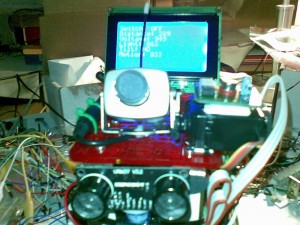
- URM37 ultrasonic range finder, rotateable using a servo motor
- Infrared range sensor for detection of lower obstacles
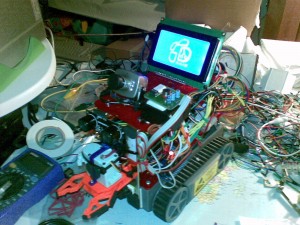
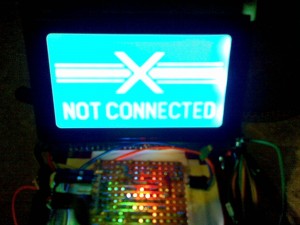
- Monochrome graphic LCD display with 128×64 pixels
- 5 white LEDs with adjustable brightness, plus a red, green and blue LED
- 9,6 V battery with 3800 mAh
Remote control
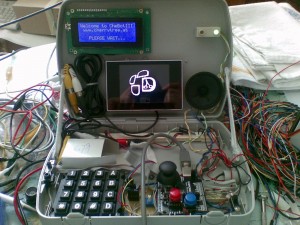
- Core: Arduino Duemilanove (using an ATmega328 microcontroller at 16 MHz)
- Base: Old box from a KOSMOS kit
- Monochrome character LCD display with 40×4 characters
- LCD Smartie serial LCD controller board from SureElectronics – a bit hacked since it was originally designed for USB connection
- Cheap no-name display with two composite video inputs, one connected to the microcontroller (using TVout library), one connected to the receiver for the camera
- APC220 wireless module for communication with robot
- DFRobot Input Shield with analog joystick and two buttons
- 4×4 keypad
- 9,6 V battery with 3800 mAh
Features
The robot has several programs, which can be chosen using the remote control:
- Full remote control
- Moving the robot
- Opening/closing the gripper
- Adjusting the lights
- Rotating ultrasonic sensor
- Tilting the camera
- Playing a sound from the SD card
- Displaying a bitmap from the SD card
- Playing a recorded sound track
- Audio recorder – for recording tracks and later playing them in full remote control mode
- Route recorder – for recording a move route or replaying it
- Simple avoider – moves forward and then moves diagonally backward when the infrared sensor detects an obstacle
- Ultrasonic avoider – a bit more intelligent; uses the rotatable ultrasonic sensor to detect and avoid objects earlier
More programs will follow.
In all programs, the camera’s image can be viewed using the composite display on the remote control.
Some time ago, I added a “watch control mode”, in which the robot can be controlled using the accelerometer of the EZ430 Chronos watch by Texas Instruments instead of using the remote control.
Images
CheBot II, so-to-say - just a first proof-of-concept of the wireless motor control
The remote control, without battery since USB is attached
Robot, yet without display, wave shield and speaker
The nearly finished roboted, showing the splash screen
Front view
View from top, with nice LED effect board
The finished robot and remote control
7 Responses to “CheBot III”
-
Lloyd says:
2011/01/17 at 18:19
Boah, Cherry!
Abgefahren! Hast du dir alles selbst beigebracht, was du dafür wissen musst? Hat dir wer dabei geholfen?
Sieht sehr fetzig aus. Besonders Routen-Rekorder, und die Ausweicher Sachen klingen sehr interessant.
Würde das ganze sehr gerne mal bewegt sehen, sonst kann ich das ganze nicht ganz glauben
Hm, ich spekuliere grad ein wenig rum. Ginge es nicht sogar, dass du ihn einmal durch das ganze Haus / Etage führst, er sich die Routen merkt, und dann eine route in jeden Raum finden kann? Wäre sehr cool, und ginge noch einen Schritt weiter.
Eine Idee hab ich noch

Er versucht eine Route langzufahren, muss dabei aber Gegenständen ausweichen. Also versucht er, immer wieder auf die Route zurück zu kommen.Naja, das wars von mir, viel Erfolg noch, und bis dann! o/
-
Cherry says:
2011/01/18 at 12:52
Hast du dir alles selbst beigebracht, was du dafür wissen musst? Hat dir wer dabei geholfen?
Wenn ich mir helfen lasse, macht es mir keinen Spaß mehr.
Würde das ganze sehr gerne mal bewegt sehen, sonst kann ich das ganze nicht ganz glauben

Naja, Video wird irgendwann folgen. Hatte noch nicht die passende Umgebung dazu.
Hm, ich spekuliere grad ein wenig rum. Ginge es nicht sogar, dass du ihn einmal durch das ganze Haus / Etage führst, er sich die Routen merkt, und dann eine route in jeden Raum finden kann?
 Wäre sehr cool, und ginge noch einen Schritt weiter.
Problem: Das ganze ist nicht sehr genau, weil nur alle 40ms die Bewegungsdaten gespeichert werden, wodurch das ganze besonders bei Kurven gerne ungenau wird…
Er versucht eine Route langzufahren, muss dabei aber Gegenständen ausweichen. Also versucht er, immer wieder auf die Route zurück zu kommen.
Das wird besonders kompliziert, da Kurvenfahren je nach Bodenbeschaffenheit verschieden gut funktioniert. Da das Ding (noch) keinen digitalen Kompass hat, kann es sich daher nicht sicher sein, wirklich auf der Route zu sein!
Aber danke für deine Vorschläge und das positive Feedback

-
-
David G. says:
2011/07/06 at 22:11
Hey, ich wollte fragen ob du Interesse an einem Austausch der Links hättest? Das würde ganz einfach so funktionieren: Wir erstellen beide einen Link (im Footer oder im Widgetbereich) zur jeweils anderen Webseite auf der eigenen Seite. (Deinen habe ich auf meiner schon erstellt, am Ende der Seite
 ) Das bringt uns beide mehr Besucher und höhere Positionen in Suchmaschinen.
  Hier meine Seite: http://staubsaugerbeutellostest.com/ Wie gesagt, am Ende der Webseite findest du den Link zu deiner Webseite. Würde mich freuen, wenn du innerhalb der nächsten Tage auch zu meiner Seite einen Link platzieren würdest. Kannst gerne auch ein Kommentar irgendwo auf meiner Seite hinterlassen.
  Mfg
Mfg-
Cherry says:
2011/07/07 at 8:55
Sehr nett, allerdings bin ich nicht an Linktausch mit einer themen-irrelevanten Seite interessiert!

-
-
Orochii says:
2011/08/12 at 5:30
It just seems… =F lovely. I want one of these!
Also, the ultrasonic gidance is cool, and would be the best bet. Yeah, why would someone try to make “colour interpretation” when you can make a robot superhuman? And two legs? who needs them? Who needs a face?Arrgh, robots are just kickass,
Orochii Zouveleki-
Cherry says:
2011/08/14 at 14:27
Yeah, thanks.
By the way, it has a face. But only if it wants. (Image from SD card.)
-
-
Anakin Skywalker says:
2012/07/13 at 0:52
Mein Roboter ist besser! Er kann sogar sprechen!
